-
Resolving Conflict with Empathy
Note: I wrote the following note over a year ago, but only recently decided to send it to my newsletter. I’m not sure why I sat on it so long. Your [respectful] thoughts are welcome on Twitter.
Empathy doesn’t always come easy, but it goes a very long way toward building trust with those around you. I’ve seen many well-intentioned people lose the trust of their peers because they fail to communicate with empathy. Perhaps they rush when replying to a message, or they fail to set aside frustration with a decision they believe should have gone a different way. In many cases this is a matter of differently weighed trade offs or a misunderstanding about who is empowered to make a decision. It turns out these things are sometimes unclear.
It’s important to take a step back in moments like these to get a broader view of the situation: try to understand the position the other person is in, their priorities, how they may be weighing trade offs differently from you, whether they have context you don’t, and who should make the decision. Afterward, think about how to move the conversation forward in a way that’s constructive in the short and long term. Be direct, but diplomatic and try to address their concerns directly.
I understand using light gray for the text color here is important to you because it matches our logo, but it’s really important that the contrast is high so people with colorblindness can read it.
This example is intentionally low key — let’s set that aside. We start by showing empathy for our colleague’s point of view. We tell them we understand their concern and attempt to repeat it. This gives them a chance to correct us if there’s a misunderstanding on our part. We then share our proposed decision and the explicit trade offs we’ve made. In the first example above, we posited accessibility was more important than whether text color matches our logo color. Making implicit value judgements about trade offs explicit is key to building understanding.
If we don’t understand the concern then we ask clarifying questions.
I want to make sure I understand your concern. Are you worried about whether the text color matches the logo, or are you generally worried about brand guidelines? Is it something else?
Earlier I said to be “constructive in the short and long term” but what I really mean is if you treat people poorly then they will not want to work with you. If you do this repeatedly then you’ll have a bad reputation and, in turn, your effectiveness will go down over time as more teammates view working with you as a burden.
You might have been told to “disagree and commit” at some point in your career. Knowing when to fold ‘em, as they say (whoever “they” are), is an important tool in maintaining trust long term and maximizing your effectiveness at work. When deciding whether you should disagree and commit you should consider the long and short term ramifications of a decision[1] and whether you’re the person empowered to make the decision. For instance, if the decision is regarding something like the naming of an internal API then arguing until you get your way is going to erode some amount of trust from your teammate(s). Over time situations like this will cause you to be seen as an inflexible person. On the other hand, advocating for something like maintaining or increasing user privacy is likely really important and is worth fighting for.
You might also be asked to consult on a decision. This might come in the form of a friend or colleague asking for advice, or some sort of group setting that’s more formal. It’s important to recognize your place in these situations. Are you being asked to give input or are you the decision maker? It’s important to set your expectations accordingly to avoid disappointment if the designated decision maker makes a decision in conflict with your advice. If you don’t understand the decision then ask what trade offs they made or what additional context and inputs they took into account. Remember that they may weigh trade offs differently from you and that’s okay.
If you’re a decision maker asking others for advice, then set their expectations early. Some people may need you to tell them their input is valuable and appreciated, but you are also taking many inputs into account in some broader scope. These people may also need to be told directly that you may make a decision counter to their recommendation if other inputs need to be weighed more heavily. This approach can help avoid needless escalation and conflict.
Resolving conflict is more difficult if there’s not a well-defined decision maker. For example, consider the case where you and a peer have conflicting viewpoints on a decision and you’re at a stalemate after going through the process. In cases like this it’s helpful to bring in a third party to mediate or break the tie. It might also be helpful to consider whether the decision is reversible. If it is, then it’s easier to disagree and commit to move forward. If it doesn’t work out the team can take its lumps and change course. Most decisions are reversible.
A final note: it’s sometimes quite hard to strike the right balance between directness and respectful tone in text. Try talking to your counterpart face to face or video chat if a conversation goes sideways via text chat. It may remind you both there’s a human on the other side of the discussion.
[1] It’s important to keep ethics in mind here. If you’re fighting to uphold some ethical boundary then it’s always worth continuing to advocate for your position.
-
Finding Dependency Cycles in iOS Builds with llbuild UI
Did you know the swift-llbuild project contains a debugging tool called
llbuild-uithat can find dependency cycles in your iOS build? To try it:- Enable the New Build System (In Xcode it’s under File, Workspace Settings)
- Build your project
- Open the Derived Data directory on your machine and find the
build.dbfile generated by the build system. This will be in a path similar to/Users/<yourUsername>/Library/Developer/Xcode/DerivedData/iOS-<someIdentifier>/Build/Intermediates.noindex/XCBuildData/build.db. Take note of this path as you will need it later. - Follow the instructions here to install llbuild UI. You’ll need to have Python (and probably some dependencies) installed on your system.
- Start llbuild UI by running the command shown on the Github page linked in step 4 above in terminal.
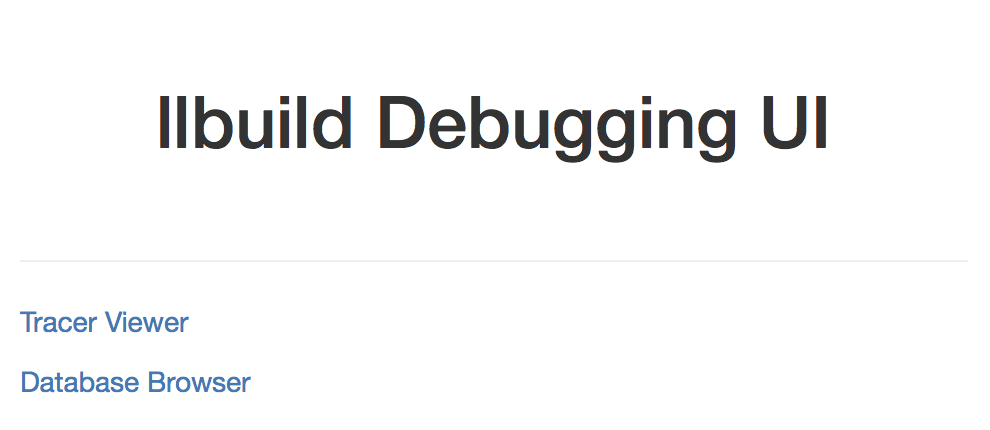
FLASK_APP=llbuildui.app venv/bin/python -m flask run - Visit
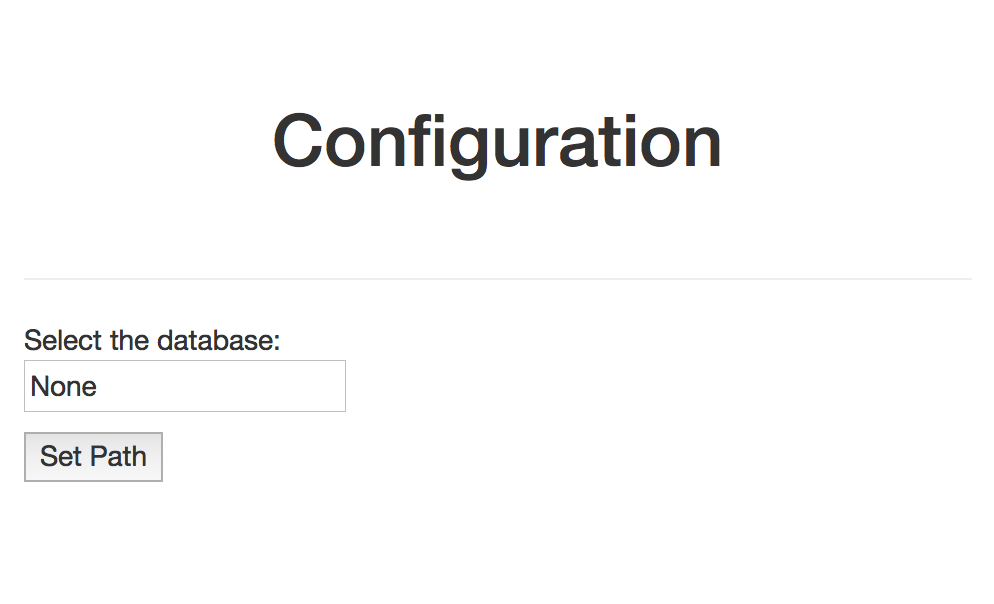
http://127.0.0.1:5000/in your browser. You should see something like this: - Click on Database Browser, which will show you the database configuration screen:
- Paste the path from step 2 above into the field and click “Set Path”
- Wait until the page refreshes then change the address in your browser’s address bar to
http://127.0.0.1:5000/db/diagnostics. Any cycles found in your build should be shown on screen.
-
Diagnosing “Dependency Cycle Between Targets” in Xcode 9’s New Build System
Xcode 9 includes a new build system that can substantially improve build times. The new build system is more strict about build issues, but some of its diagnostic output can be difficult to reason about. One difficult to debug error is “Dependency cycle between targets,” which may appear during incremental builds where you may not have an explicit circular build dependency between targets. Let’s talk about how these types of cycles are introduced and how to troubleshoot and fix them.
There is more than one way to cause this sort of target dependency cycle without adding an explicit target dependency. The behavior of the legacy build system is to continue to (re)build instead of failing. This can increase incremental build times for your project, but the build ultimately succeeds and you may not know there’s a problem. The new build system fails instead, which helps you better maintain your project and means better incremental build times once you’ve fixed the dependency issues.
During a full (clean) build the compiler will emit a list of dependencies for each compilation unit in your project. On subsequent (incremental builds), this data is used by the build system to help determine what parts of your project need to be rebuilt depending on what has changed since the last build. This list may include implicit dependencies (not to be confused with the per-scheme setting!) picked up by the compiler.
First, set this flag to get a bit more diagnostic info in the build log:
defaults write com.apple.dt.XCBuild EnableDebugActivityLogs YES
Reproduce the dependency cycle error and expand the related error message in the build log. Usually there’s a file name in the log. Open that file and make sure its imports are correct. For instance, if a library B is consumed by library A and library B also #imports a file in library A then there’s a circular dependency. Remove the offending import and build again.
There’s at least one more way to introduce implicit dependency cycles. For instance, modulemaps within header search paths will be added as dependencies for a given file automatically. In fact, a file may introduce a dependency cycle with its own module if the (e.g. static library manually specifying a modulemap) target containing the file has a modulemap in its Headers build phase and that phase is placed after the Compile Sources build phase. This can be resolved by dragging the Headers phase above the Compile Sources phase in the Build Phases subtab of your target’s settings in Xcode.
If this doesn’t work then it’s time to dig a bit deeper. You can see a list of dependencies (found by the compiler) for a given file by inspecting the contents of
<filename>.din~/Library/Developer/Xcode/DerivedData/<project-name>-<some-identifier>/Build/Intermediates.noindex/<name>.build/Debug-<target-device>/<name>.build/Objects-normal/<arch>/after performing a build.Look for modulemaps that don’t belong in the dependency list. For instance, if the file is in library A and library A’s target doesn’t depend on libraries B and C, but B and C’s modulemaps appear in the dependency list then library A’s header search paths are likely misconfigured. Clean up library A’s the header search paths and try again.
This is probably not an exhaustive list of ways to cause and fix this error. You can let me know if you know more about this issue on Twitter.
-
Implementing Rich Notifications in iOS 10
I’ve spent a bit of time with notification extensions in iOS 10 and they’re pretty great. If you’re not familiar with notification extensions, check out Apple’s Introduction to Notifications talk before reading this post. Anywho, notification extensions improve your app’s notification experience giving you a chance to mutate notification payloads, download and display media, and show custom interfaces in response to notifications. I thought I’d share a bit about how they work and a few things I ran into while adding notification extensions to an existing app.
Before we dive in, I should mention that iOS 10 brings other fancy notification enhancements like aggregation, a way to handle notification actions in an extension, and the ability to opt into system notification banners for your application while it is open. I’ve chosen to focus on processing and displaying notifications in this post so I won’t get to any of those things. Okay, on to the good stuff.
iOS 10 brings two new notification extensions: Service and Content. Service extensions let you mutate notification payloads and Content extensions give you a way to show a custom interface in response to notifications. Incidentally, Content extensions also allow you to handle custom actions.
Service Extensions
Service extensions give you a chance to modify notification payloads before they are displayed by the system. For instance, you might decrypt some text in the payload on the client before displaying it or download an image, video, or GIF, and attach it to the notification itself. Or you might set a localized title and subtitle to be shown in the notification banner.
A Service extension’s entry point class is a subclass of
UNNotificationServiceExtensionthat overrides two methods:func didReceive(UNNotificationRequest, withContentHandler: @escaping (UNNotificationContent) -> Void)andfunc serviceExtensionTimeWillExpire(). The system starts your Service extension when a notification payload with the “mutable-content” key set to 1 (in the “aps” dictionary) is received.didReceive(_:withContentHandler:)is then called and passed an instance ofUNNotificationRequestrepresenting the notification received and a completion block to call when you’re finished processing the payload. You should assign both to instance variables because you will need to access them elsewhere if you take too long to process a notification.The system gives you a limited amount of time to process a notification.
serviceExtensionTimeWillExpire()is called if you fail to call the completion handler in time. This is your last opportunity to wrap up processing and the completion block with the updated notification content. For instance, if you’ve downloaded two of four images you would call back with those two images attached and cancel your remaining downloads.One important thing I recently learned is you cannot modify silent notifications (e.g. “content-available” or notifications that play a sound or badge the icon without including an alert key) using a Service extension. Apple calls this out clearly in their documentation.
You can query the notification request’s content property, which is of type
UNMutableContent. You can make a mutable instance of this object by callingmutableCopy(). Now you can modify all of the basic properties of a notification including the title, subtitle, body, badge count, and userInfo in the Service extension. Note that if you set the body text to an empty string, the system will ignore changes you made to the notification content and render the original alert from the payload text with a default UI instead.You can also fetch and attach audio, images, GIFs, or movies to the instance of
UNMutableNotificationContentyou were passed earlier. Once you’ve downloaded media to disk, you can to initialize an instance of UNNotificationAttachment with a string identifier, the file URL, and options (if needed) and attach it to the notification content.Audio downloads are currently limited to 5MB, images to 10MB, and video to 50MB. These are rather large limits so I recommend serving small files in an effort to be respectful of your user’s bandwidth.
The process of downloading multiple files is well documented elsewhere, but in short you can use dispatch_groups or NSOperation to wait until all downloads are complete then call the system provided completion block with the notification content.
I suggest using the remote URL’s absoluteString as the identifier. This way, you can easily map the remote URL from your notification payload to the attachment identifier for the attachment you downloaded at a later time in your Content extension if needed. One way to do this is to share models between your Service and Content extension.
You must create the URL passed to
UNMutableNotificationContent‘s initializer withNSURL.fileURL(withPath:, isDirectory:)or the corresponding initializer. You’ll receive an error about an invalid attachment at run time if you create a URL with the on-disk path with the default NSURL initializer.Like other extensions, you can set up app groups and keychain sharing to share data between the extension and your host app. For instance, you could add downloaded media to a shared, on-disk cache for your host app to consume or vice versa.
iOS provides a default interface to display media that supports displaying one media item at a time. You’ll want to write a Content extension if you want to show more than one image at a time or show a custom interface.
Content Extensions
Content extensions let your show a custom interface for a given notification payload. The system starts your Content extension when a notification with the “category” key (in the “aps” dictionary) is set to a value registered at build time in your extension’s info.plist (via the
UNNotificationExtensionCategorykey). This value can be a string or an array containing many categories. You can technically bundle multiple Content extensions with your app to handle different categories of notifications, but provisioning overhead (profiles, code signing, etc.) can make this painful. This might be useful if processing different types of notification is very different.A Content extension’s entry point is a UIViewController subclass that implements the
UNNotificationContentExtensionprotocol. There’s one required method:func didReceive(_ notification: UNNotification), which is called when the user expands a notification banner by 3D Touching the banner, pulling down on it when it slides down from the top of the screen, or by tapping the View button after swiping from right to left in Notification Center.Otherwise, it’s like working with any other view controller. Mostly.
If you intend to have a completely custom interface, including labels for the title, subtitle, and body text then you must set
UNNotificationExtensionDefaultContentHiddento true in your Content extension’s the info.plist. Otherwise, the Apple provided UI will appear below your custom view. Frankly, I’d stick to Apple’s text views unless you don’t mind text layout, which can be pretty painful even when using stack views. Either way, be sure to test your layouts on devices with varying screen sizes to make sure your code behaves the way you expect it to.The system animates the notification from a height based on a ratio specified by the
UNNotificationExtensionInitialContentSizeRatiokey in your Content extension’s info.plist. For instance, if you set this to 0.3, the initial height of the expanded notification will be 0.3 * the content width of the notification view. The notification will then animate to the height you’ve specified as thepreferredContentSizeor whatever the intrinsic content size of your view is. If your notification collapses and you only see the Apple provided banner (or the banner and Apple’s text) then it’s likely you’ve set a height of 0 for your view. Check your constraints and pray.If you’ve attached media to the notification content, you can access it for use in your UI with one additional step. You need to call
startAccessingSecurityScopedResource()on the attachment’s URL before consuming the media referenced by an attachment. When you’re done accessing the media, you must callstopAccessingSecurityScopedResource()or your extension will leak kernel resources! In my experience the best place to call the latter is indeinit()ordealloc()because bad and strange things happen™ if you callstopAccessingSecurityScopedResource()too early. For instance, images may render incorrectly or not at all.Calling
stopAccessingSecurityScopedResource()on a URL you have not calledstartAccessingSecurityScopedResource()on is a no-op. This means iterating over all attachment URLs to callstopAccessingSecurityScopedResource()is perfectly safe.Random Stuff
A general debugging tip: I found I needed to build and run my host app’s scheme to deploy the app and extension, click stop, then build and run the extension’s scheme to make Xcode properly deploy the updated appex to my device after making code changes to the extension. It’s possible I was doing something wrong, but keep this in mind if it looks like your code changes aren’t taking effect after building and running your extension’s scheme.
I also ran into an interesting (and rare) issue. Sometimes Notification Center stops appearing in response to a swipe down from the top of the screen. I’ve noticed notification banners also stop appearing when this happens.
DeleteReboot your device to fix both.Drop me a note on Twitter (@amdev) if you found this post helpful.
-
GCD: Using Dispatch Groups for Fun and Profit
I’m republishing this article here so I can reference it later.
I recently needed a way to perform an unknown number of asynchronous http requests and wait until they were all done before proceeding. dispatch_groups are a neat feature of Grand Central Dispatch (GCD) that made this easy to do.
There are a couple of ways to use dispatch_groups but the basic idea is the same: create a dispatch_group, give it some tasks, and wait for it to finish those tasks.
First, let’s create a group:
dispatch_group_t group = dispatch_group_create();
There are two ways to add tasks to our dispatch_group. You can either call dispatch_group_async with the group, a dispatch_queue and block to run or manually call dispatch_group_enter.
Calling dispatch_group_async looks something like this:
dispatch_group_async(group, dispatch_get_global_queue(DISPATCH_QUEUE_PRIORITY_DEFAULT, 0), ^{
    // Do stuff on a global background queue here
});
Or you can manage tasks manually by calling dispatch_group_enter and dispatch_group_leave in pairs:
dispatch_group_enter(group);
dispatch_async(dispatch_get_global_queue(DISPATCH_QUEUE_PRIORITY_DEFAULT, 0), ^{
    // Do stuff on a global background queue here
    dispatch_group_leave(group);
});
Using dispatch_group_enter/dispatch_group_leave is handy when you’re using libraries that provide asynchronous operation (e.g. AFNetworking).
The last thing to do is wait for all of the tasks to finish. The preferred way to do this is to use dispatch_group_notify:
dispatch_group_notify(group, dispatch_get_main_queue(), ^{
    // Do stuff after all tasks are finished
});
dispatch_group_notify is nice because it does not block the thread it’s called from. If you have a reason to block the current thread, use dispatch_group_wait instead:
dispatch_group_wait(group, DISPATCH_TIME_FOREVER);
// Do stuff after all tasks are finished
A full example looks like this:
dispatch_group_t group = dispatch_group_create();

dispatch_group_async(group, dispatch_get_global_queue(DISPATCH_QUEUE_PRIORITY_DEFAULT, 0), ^{
    // Do stuff on a global background queue here
});

dispatch_group_async(group, dispatch_get_global_queue(DISPATCH_QUEUE_PRIORITY_DEFAULT, 0), ^{
    // Do more stuff on a global background queue here
});

dispatch_group_notify(group, dispatch_get_main_queue(), ^{
    // Do stuff after all tasks are finished
});
One important note about dispatch objects: If your project’s deployment target is less than 6.0, you need to manage memory with dispatch_retain and dispatch_release for any dispatch objects you create (groups, queues, semaphores). ARC takes care of managing memory for dispatch objects when your deployment target is 6.0+ (10.8+ for OS X).

Amro's Blog
puns, pizza, and performance reviews
